Macbook Pro M3 Max が届いたので環境構築やる
- マシンスペック
- 準備
- 手順
- 終わりに
私用の開発マシンとして注文した Macbook Pro M3 Max が届いた。スペースブラックがかっちょいい。
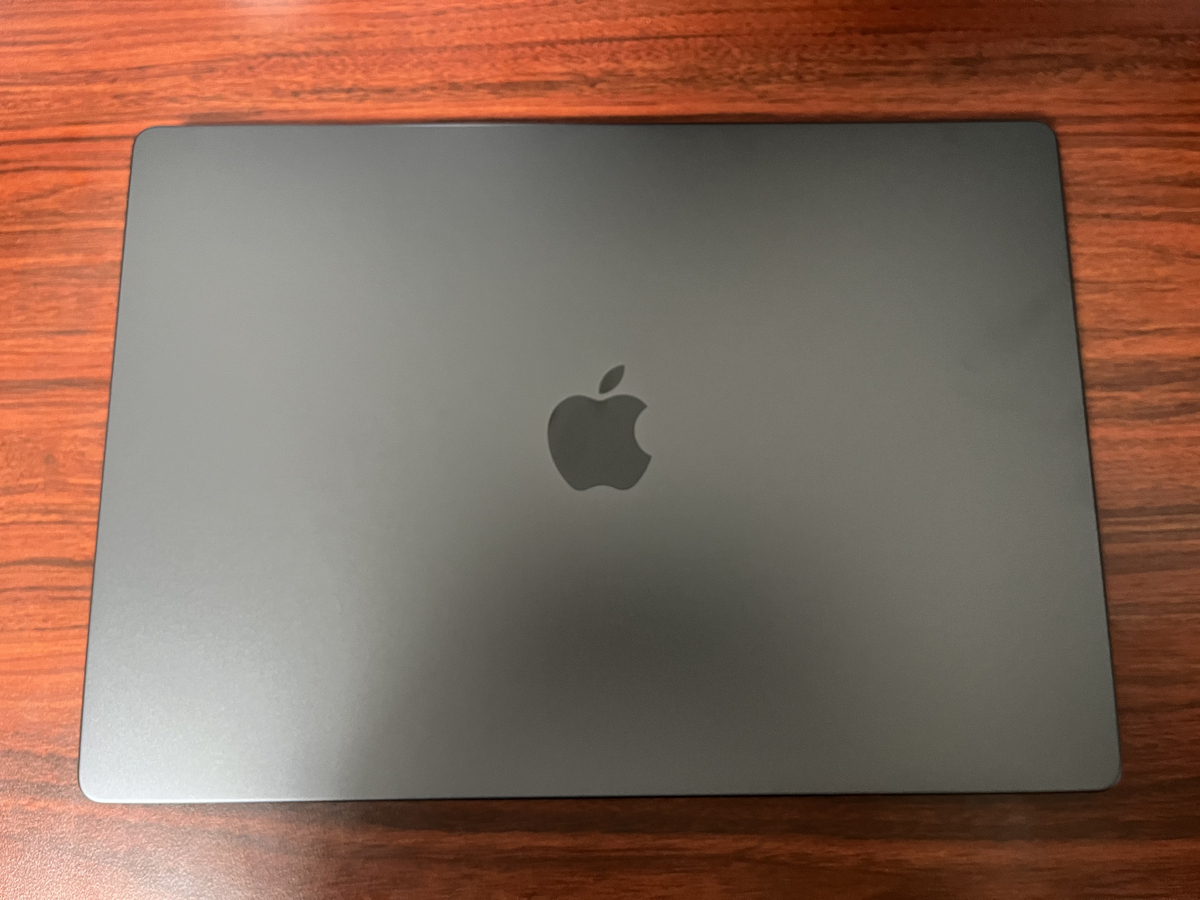
macOS を使用しての開発はこれからもありそうなので、環境構築の手順を備忘録として残しておく。自宅のネットワークが弱々かつ本記事をまとめながら書いていたので計 8 時間くらいかかった(インストールの待ち時間が半分を占めてる)。
マシンスペック
せっかくマシマシにしたのでスペックを nushell で表示。
- OS: macOS Sonoma 14.4
~> sys | get host
│ name            │ Darwin                                                         │
│ os_version      │ 14.4                                                           │
│ long_os_version │ MacOS 14.4                                                     │
│ kernel_version  │ 23.4.0                                                         │
│ hostname        │ nukopy-mbp-m3max.local                                         │
- CPU: Apple M3 Max (16 Cores)
~> sys | get cpu                                                                                                                     05/11/2024 08:23:20 PM
╭────┬──────┬──────────────┬──────┬───────────┬──────────────────┬───────────╮
│  # │ name │    brand     │ freq │ cpu_usage │   load_average   │ vendor_id │
├────┼──────┼──────────────┼──────┼───────────┼──────────────────┼───────────┤
│  0 │ 1    │ Apple M3 Max │ 4056 │     14.60 │ 1.81, 2.31, 2.41 │ Apple     │
│  1 │ 2    │ Apple M3 Max │ 4056 │     12.20 │ 1.81, 2.31, 2.41 │ Apple     │
│  2 │ 3    │ Apple M3 Max │ 4056 │      2.60 │ 1.81, 2.31, 2.41 │ Apple     │
│  3 │ 4    │ Apple M3 Max │ 4056 │      5.00 │ 1.81, 2.31, 2.41 │ Apple     │
│  4 │ 5    │ Apple M3 Max │ 4056 │      2.40 │ 1.81, 2.31, 2.41 │ Apple     │
│  5 │ 6    │ Apple M3 Max │ 4056 │      0.00 │ 1.81, 2.31, 2.41 │ Apple     │
│  6 │ 7    │ Apple M3 Max │ 4056 │      0.00 │ 1.81, 2.31, 2.41 │ Apple     │
│  7 │ 8    │ Apple M3 Max │ 4056 │      0.00 │ 1.81, 2.31, 2.41 │ Apple     │
│  8 │ 9    │ Apple M3 Max │ 4056 │      0.00 │ 1.81, 2.31, 2.41 │ Apple     │
│  9 │ 10   │ Apple M3 Max │ 4056 │      0.00 │ 1.81, 2.31, 2.41 │ Apple     │
│ 10 │ 11   │ Apple M3 Max │ 4056 │      0.00 │ 1.81, 2.31, 2.41 │ Apple     │
│ 11 │ 12   │ Apple M3 Max │ 4056 │      0.00 │ 1.81, 2.31, 2.41 │ Apple     │
│ 12 │ 13   │ Apple M3 Max │ 4056 │      0.00 │ 1.81, 2.31, 2.41 │ Apple     │
│ 13 │ 14   │ Apple M3 Max │ 4056 │      0.00 │ 1.81, 2.31, 2.41 │ Apple     │
│ 14 │ 15   │ Apple M3 Max │ 4056 │      0.00 │ 1.81, 2.31, 2.41 │ Apple     │
│ 15 │ 16   │ Apple M3 Max │ 4056 │      0.00 │ 1.81, 2.31, 2.41 │ Apple     │
╰────┴──────┴──────────────┴──────┴───────────┴──────────────────┴───────────╯
- メモリ: 128 GiB
~> sys | get mem                                                                                                                     05/11/2024 08:24:27 PM
╭────────────┬───────────╮
│ total      │ 128.0 GiB │
│ free       │ 75.9 GiB  │
│ used       │ 34.0 GiB  │
│ available  │ 110.1 GiB │
│ swap total │ 0 B       │
│ swap free  │ 0 B       │
│ swap used  │ 0 B       │
╰────────────┴───────────╯
- ストレージ: 4 TiB
~> sys | get disks                                                                                                                 1 05/11/2024 08:26:06 PM
╭───┬──────────────┬──────┬──────────────────────┬─────────┬─────────┬───────────┬──────╮
│ # │    device    │ type │        mount         │  total  │  free   │ removable │ kind │
├───┼──────────────┼──────┼──────────────────────┼─────────┼─────────┼───────────┼──────┤
│ 0 │ Macintosh HD │ apfs │ /                    │ 3.6 TiB │ 3.6 TiB │ false     │ SSD  │
│ 1 │ Macintosh HD │ apfs │ /System/Volumes/Data │ 3.6 TiB │ 3.6 TiB │ false     │ SSD  │
╰───┴──────────────┴──────┴──────────────────────┴─────────┴─────────┴───────────┴──────╯
準備
手順
初期設定ウィザード
- システム言語:English
- Accesssibility:Not Now
- リージョン:Japan
- Migration Assistant:Now Now
- Wi-Fi:
- SSID:xxxx
- Password:xxxx
- Apple ID:
- Apple ID:xxxx
- Password:xxxx
- Computer Account
- Full name: xxxx
- Account name: nukopy
- Password: xxxx
Command Line Tools for Xcode、Xcode をインストール
Homebrew や他のソフトウェアをビルドするときに大体必要になる。
xcode-select -—install

Homebrew をインストール
/bin/bash -c "$(curl -fsSL https://raw.githubusercontent.com/Homebrew/install/HEAD/install.sh)"
初期設定に最低限必要なアプリケーションのインストール
まずは諸々設定するのに必要なパスワードマネージャとブラウザをインストールする。
# PATH を一時的に通す
export PATH="/opt/homebrew/bin:$PATH"
brew install --cask 1password google-chrome spotify
brew に PATH を通す設定を永続化するのは、GitHub 上の dotfiles リポジトリを使って zsh の設定をするときなので一旦後回し。
1Password の設定
Launchpad に追加された 1Password を起動し、ログインする
Google Chrome の設定
- Launchpad に追加された Google Chrome を起動
- Google Chrome をデフォルトブラウザに設定
- 1Password を使用して、必要な Google アカウントへログインする。2 段階認証は手元の iPhone の Gmail アプリで行う。
- メインで使用している Google アカウントの拡張機能の Sync を on にする
Spotify の設定
(作業中に音楽をかけたいのでここも早急に設定する)
(以降 Launchpad は省略)
マウスの設定
MX Ergo の設定
MX Ergo の初期設定を行うため、まずは下記公式 HP からインストーラをダウンロードし、Logi Options+ をインストールする。
- MX Ergo をペアリングモードにする
- System Settings > Bluetooth > Nearby Devices で MX Ergo の
Connectをクリック - MBP と MX Ergo のペアリング Done
- Logi Options+ を起動
- System Settings にて、アクセシビリティ等の各種 OS の機能へのアクセスを許可する必要がある
- Logi Options+ でマウスの設定を行う
マウスの設定
- System Settings > Mouce
- Tracking Speed: 7 (Fast 側)
- Natural scrolling: on
トラックパッドの設定
こっちもついでに。
- System Settings > Trackpad
- Tracking speed: 7 (Fast 側)
- Click: medium
- Tap to click: on(Secondary click が Two Fingers になる)
キーボードの設定
- System Settings > Keyboard
- キーリピート設定
- Key repeat rate: Fast Max(右端)
- Delay until repeat: Short Max(右端)

- >
Keyboard Shortcuts...ボタン- > Input Sources
- Select the previous input source:
^Space(ctrl + スペースで入力ソースの切り替え)
- Select the previous input source:
- > Modifier Keys
- Caps ロックを ctrl にする(Emacs のショートカット用)
- Select keyboard:
Apple Internal Keyboard / Trackpad- Caps Lock key:
^ Control
- Caps Lock key:
- Select keyboard: HHKB Professional
- Caps Lock key:
^ Control
- Caps Lock key:
- > Input Sources
- > Text Input > Input Sources >
Edit...ボタン- All Input Sources
- 自動訂正、挿入系の設定
- Correct spelling automatically: off
- Capitalize words automatically: off
- Add period with double-space: off
- クォート設定
- Use smart quotes and dashes: off(ダブルクォート、シングルクォートが斜めにならないようにする)
- For double quotes:
"abc" - For single quotes:
'abc'
- For double quotes:
- Use smart quotes and dashes: off(ダブルクォート、シングルクォートが斜めにならないようにする)
- 自動訂正、挿入系の設定
- Japanese - Romaji
- Live Conversion: off
- Correct spelling: off
- All Input Sources
- キーリピート設定
PC 名の変更
Bonjour(mDNS)で使用されるサーバ名を「英小文字+ハイフン」にしたいので、デフォルトの PC 名から変更する。
- System Settings > General > About
- Name: xxx

ネットワーク設定
固定 IP を振る。
- System Settings > Network
OS の更新設定
- System Settings > General > Software Update
- Automatic Updates: off
- Beta Updates: off
Touch ID の設定
左右の必要な指の指紋を追加。ロック画面の解除や 1Password のロック解除など。
- System Settings > Touch ID & Passowrd
- Touch ID > Add Fingerprint

言語、リージョン、日付
- System Settings > General
- > Language & Region
- Preferred Languages:
- English
- 日本語
- Region: Japan
- Calendar: Japanese
- First day of week: Monday
- Preferred Languages:
- > Date & Time
- Set time and date automatically: on
- Set time zone automatically using your current location: on
- Time zone: Japan Standard Time (JST)
- Closest city: Tokyo - Japan
- > Language & Region
Appearance の設定
- System Settings > Appearance
- Appearance: Dark
Control Center の設定
メニュバーに表示するアイテムの設定
- System Settings > Control Center > Control Center Modules
Dock の設定
- System Settings > Desktop & Dock
- Size: 小さくする(Dock のアイコンサイズをデフォルトより小さくする)
- Magnification: インタラクションが発生する程度に設定する(デフォルトはオフになっている)
- Automatically hide and show the Dock: on

ディスプレイの設定
4K ディスプレイだけ文字の大きさの調節が必要なので設定を行う。
- System Settings > Displays
- DeLL U3223QE
- Use as: Extended display
- 解像度: 2560 x 1440
- DeLL U3223QE

Finder の設定
Finder の Settings から設定変更
- Finder > Settings...
- > Advanced
- ✅ Show all filename extensions(拡張子の表示)
- Finder のウィンドウのトップバーにフルパスを表示する
defaults write com.apple.finder _FXShowPosixPathInTitle -boolean true
killall Finder
- 隠しファイルを常に表示する(
.gitなどの dotfiles など)
defaults write com.apple.finder AppleShowAllFiles TRUE
killall Finder
- スクショの保存先の変更
- 以下のコマンドを実行したらショートカット cmd + shift + 5 を実行し、
~/Desktop/screenshotsにスクショが保存されるか確認する
- 以下のコマンドを実行したらショートカット cmd + shift + 5 を実行し、
mkdir ~/Desktop/screenshots  # ディレクトリを作成しないとデスクトップに直接スクショが吐かれてしまうので必須
defaults write com.apple.screencapture location ~/Desktop/screenshots
killall SystemUIServer
開発環境の構築
ここからがメイン
X(Twitter)へログイン
GitHub へログイン
開発ツールのインストール
まずは最低限
brew install make gh eza
brew install --cask alacritty
GitHub CLI の設定
gh auth login コマンドを用いて、Web ブラウザで GitHub へログインする。
gh auth login
# ? What account do you want to log into? GitHub.com
# ? What is your preferred protocol for Git operations on this host? SSH
# ? Generate a new SSH key to add to your GitHub account? Yes
# ? Enter a passphrase for your new SSH key (Optional):
# ? Title for your SSH key: GitHub CLI
# ? How would you like to authenticate GitHub CLI? Login with a web browser
参考:俺たちはもう GitHub のために ssh-keygen しなくていい
dotfiles の設定
ひとまず開発用のディレクトリを作っておく。
cd ~
mkdir Projects
dotfiles リポジトリを clone
cd Projects
gh repo clone nukopy/dotfiles
ブートストラップスクリプトを実行する
- Requirements
cd dotfiles
bash bootstrap.bash
出力
--------------------------------------------------------------------------------

                 888          888     .d888 d8b 888
                 888          888    d88P"  Y8P 888
                 888          888    888        888
             .d88888  .d88b.  888888 888888 888 888  .d88b.  .d8888b
            d88" 888 d88""88b 888    888    888 888 d8P  Y8b 88K
            888  888 888  888 888    888    888 888 88888888 "Y8888b.
            Y88b 888 Y88..88P Y88b.  888    888 888 Y8b.          X88
             "Y88888  "Y88P"   "Y888 888    888 888  "Y8888   88888P"

                        fast environmental construction

                          github.com/nukopy/dotfiles

--------------------------------------------------------------------------------

========== System Info ==========
Hostname: nukopy-mbp-m3max.local
Hardware:
  CPU: Apple M3 Max
  RAM: 128 GB
  Disk: 3.6Ti
OS:
  Version: macOS 14.4 23E214
  Kernel: Darwin Kernel Version 23.4.0: Wed Feb 21 21:44:54 PST 2024; root:xnu-10063.101.15~2/RELEASE_ARM64_T6031

========== Make symlinks ==========
Creating symlinks to home directory...
HOME: /Users/nukopy
DOTDIR: /Users/nukopy/Projects/dotfiles
+ ln -sf /Users/nukopy/Projects/dotfiles/gitconfig/.gitconfig /Users/nukopy/.gitconfig
+ ln -sf /Users/nukopy/Projects/dotfiles/gitconfig/.gitignore_global /Users/nukopy/.gitignore_global
+ ln -sf /Users/nukopy/Projects/dotfiles/.zshenv.home /Users/nukopy/.zshenv
+ ln -sf /Users/nukopy/Projects/dotfiles/latex/.latexmkrc /Users/nukopy/.latexmkrc
+ ln -sf /Users/nukopy/Projects/dotfiles/karabiner /Users/nukopy/.config/karabiner
+ ln -sf /Users/nukopy/Projects/dotfiles/direnv/.direnvrc /Users/nukopy/.direnvrc
+ ln -sf /Users/nukopy/Projects/dotfiles/alacritty/alacritty.yml /Users/nukopy/.config/alacritty/alacritty.yml
+ ln -sf /Users/nukopy/Projects/dotfiles/starship/starship.toml /Users/nukopy/.config/starship.toml
+ ln -sf /Users/nukopy/Projects/dotfiles/spacemacs/.spacemacs /Users/nukopy/.spacemacs
+ ln -sf /Users/nukopy/Projects/dotfiles/homebrew/Brewfile /Users/nukopy/.Brewfile
+ set +ex
Creating symlinks for Xcode settings...
+ cp /Users/nukopy/Library/Developer/Xcode/UserData/IDETemplateMacros.plist /Users/nukopy/Library/Developer/Xcode/UserData/IDETemplateMacros.plist.bk
cp: /Users/nukopy/Library/Developer/Xcode/UserData/IDETemplateMacros.plist: No such file or directory
+ cp -r /Users/nukopy/Library/Developer/Xcode/UserData/KeyBindings /Users/nukopy/Library/Developer/Xcode/UserData/KeyBindings.bk
+ rm -rf /Users/nukopy/Library/Developer/Xcode/UserData/KeyBindings
+ ln -sf /Users/nukopy/Projects/dotfiles/xcode/UserData/IDETemplateMacros.plist /Users/nukopy/Library/Developer/Xcode/UserData/IDETemplateMacros.plist
+ ln -sf /Users/nukopy/Projects/dotfiles/xcode/UserData/IDETextMacros.plist /Users/nukopy/Library/Developer/Xcode/UserData/IDETextMacros.plist
+ ln -sf /Users/nukopy/Projects/dotfiles/xcode/UserData/KeyBindings /Users/nukopy/Library/Developer/Xcode/UserData/KeyBindings
+ set +ex
Done!

Please restart your shell, "exec $SHELL -l".
Brewfile を dotfiles リポジトリで管理してはいるけど結局開発途中でいらなくなったり、使わなくなったりするパッケージも結構あるので Brewfile は使わない。
各言語処理系のインストール
Rust with rustup
rustup のインストール
curl --proto '=https' --tlsv1.2 -sSf https://sh.rustup.rs | sh
インストールできたか確認
rustc --version
# rustc 1.78.0 (9b00956e5 2024-04-29)
ツールのインストール
cargo install cargo-watch
Deno
Homebrew でインストール
brew install deno
インストールできたか確認
deno --version
# deno 1.43.1 (release, aarch64-apple-darwin)
# v8 12.4.254.12
# typescript 5.4.3
Go
Homebrew でインストール
brew install go
インストールできたか確認
go version
# go version go1.22.3 darwin/arm64
複数バージョンのツールチェインを混在させる方法は公式から提供されている。goenv は使う必要がない。以下を参照。
参考:Goでは○○envが不要になった理由(バージョンアップを怠ると損する理由)
Python with Rye
グローバルで使用する Python は公式のインストーラで、プロジェクトごとの Python は Rye でインストールする(実際に開発で使うのは Rye)。
- Python のインストール
- Rye のインストール
brew install rye
インストールできたか確認
python3 --version
# Python 3.12.3

pip3 --version
# pip 24.0 from /Library/Frameworks/Python.framework/Versions/3.12/lib/python3.12/site-packages/pip (python 3.12)

rye --version
# rye 0.33.0
# commit: 0.33.0 (2024-04-24)
# platform: macos (aarch64)
# self-python: not bootstrapped (target: cpython@3.12)
# symlink support: true
# uv enabled: false
参考:久しぶりのPython環境をRyeで整える
Node.js with asdf
asdf のインストール
brew install coreutils curl

# "We highly recommend using the official git method." と書かれていたので git を使うやり方でインストール
git clone https://github.com/asdf-vm/asdf.git ~/.asdf --branch v0.14.0
. "$HOME/.asdf/asdf.sh"
asdf がインストールできたか確認
asdf --version
# v0.14.0-ccdd47d
# install plugin dependencies
brew install gpg gawk

# install the plugin
asdf plugin add nodejs https://github.com/asdf-vm/asdf-nodejs.git
Node.js をインストール(LTS の v22.x が asdf のインストール可能リストになかったので、ひとまず v20.x をインストール)
# インストール可能なバージョン一覧
asdf list all nodejs
# ...
# 20.13.1
# ...

# インストール
asdf install nodejs 20.13.1
Node.js がインストールできたか確認
node --version
# No version is set for command node
# Consider adding one of the following versions in your config file at
# nodejs 20.13.1

# グローバルの Node.js を設定する
asdf global nodejs 20.13.1

# Node.js のバージョンを表示
node --version
# v20.13.1
エディタ、IDE の設定
フォントのインストール
フォントのインストール
brew tap homebrew/cask-fonts
brew install --cask \
  font-hack-nerd-font \
  font-fira-code \
  font-noto-sans-gothic
エディタ、IDE のインストール
brew install --cask visual-studio-code jetbrains-toolbox cursor
Visual Studio Code の設定
- 起動する
- エディタ左下のユーザアイコンをクリック > Backup and Sync Settings > GitHub でログインする。ブラウザでログイン → VScode に制御が戻る。
- ログイン Done
- 設定の同期が始まる(拡張やキーボードショートカットなど)
- エディタでショートカットが使えてれば大体 OK


JetBrains 系 IDE の設定
JetBrains Toolbox 経由で各種 IDE をインストールする。時間かかるのでひとまず IntelliJ IDEA のみ。

- IntelliJ IDEA を起動
- ライセンスのアクティベート
- 設定の同期:IntelliJ IDEA > Settings > Settings Sync
- 設定の同期、Plugins などのインストールが走る
- GitHub Copilot for IntelliJ IDEA のアクティベート
- エディタでショートカットが使えてれば大体 OK

Cursor の設定
Docker Desktop for Mac のインストール
公式のインストーラをダウンロード
Rosetta 2 のインストール
softwareupdate --install-rosetta
起動する → Docker Hub にサインインする

CLI でサインイン
docker login
# Authenticating with existing credentials...
# Login Succeeded
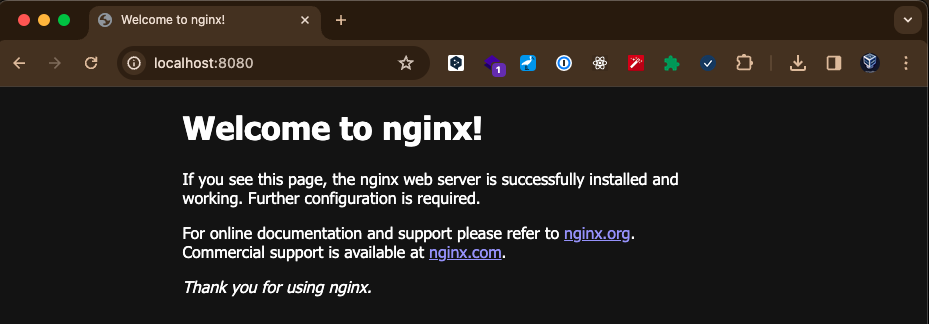
試しに Nginx の Docker image を pull してコンテナを起動してみる
# pull
docker pull nginx:latest

# pull
docker run --rm -it -p 8080:80 nginx:latest
ブラウザで http://localhost:8080 にアクセスすると以下が表示された。Docker のセットアップは完了。
残りの開発ツールのインストール
brew install \
  tree \
  pstree \
  clang-format \
  protobuf \
  lazydocker \
  curl \
  wget \
  grpcurl \
  jq \
  jnv \
  ffmpeg \
  direnv \
  htop \
  nats-server \
  # rabbitmq \
  sqlc \
  qemu \
  nushell \
  starship \
  awscli \
  google-cloud-sdk

# cask
brew install --cask \
  arduino-ide \
  blender \
  deepl \
  discord \
  fig \
  figma \
  firefox \
  flutter \
  gimp \
  microsoft-edge \
  miro \
  obs \
  obsidian \
  protokol \
  kodelife \
  sf-symbols \
  touchdesigner \
  wireshark \
  zoom \
  zulip
Tailscale クライアントを App Store でインストール後ブラウザ経由でアクティベート
その他のツールのインストール
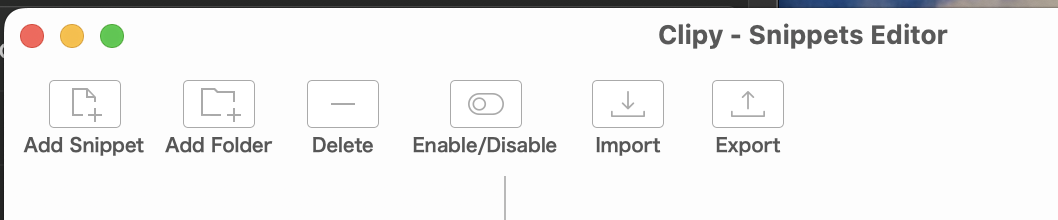
brew install --cask \
  clipy \
  monitorcontrol \
  rectangle \
  hiddenbar
clipy の設定
rectangle の設定
おすすめ設定を選択。ctrl + alt + 矢印キーでフォーカスしているウィンドウの位置、大きさが制御できれば OK。
終わりに
お財布に無理を言って人生で初めて 3 桁万円のお買い物をした(MBP M3 Max 本体 + Apple Care の価格)。 高いお金をかけてスペックマシマシにしたので 4 年以上は使えて欲しい。精進する。